Strike while the iron is hot, let's play XenServer next. Yesterday, Hao VPS installed XenServer on the server using the KVM provided by the computer room. Today we are going to play something more interesting: opening a chicken. After installing XenServer, visit our server IP and you will see two download links for XenCenter. Directly download the msi to install it (this is installed on your computer, which is equivalent to the management side and can manage the server where you have installed XenServer. ).
This is the interface for running XenCenter, as shown below:

Right-click on XenCenter, select Add, add the server, and write the server IP and root account password.

After adding, wait a moment and it will automatically connect to the server. You can see the server information as shown below. You can also restart it directly here and shut it down.

Next we will open the chicken. The first test is to open the Linux system. The system template Install from URL, follow the steps. The first step is to select the system.

Ignore the name next, just go to the next step, and then select the source of the system template. As I said before, install from the URL, then fill in the link to the system OS, and go to the next step.

The next step is to choose a hen. I only have one, so I have no choice.

Setting the CPU core and memory size of the chicken can be modified at will.

Set the hard disk size of Chicken. The default is 8GB. The hard disk size can be modified here.

Next, choose the network card to use.

The last one is summary information. You can check the various configuration information of the chicken again. If it is correct, Create now.

Next we will install the system for Xiaoji. This is easy because I chose the CentOS6 system. I have written several times about installing the CentOS system in KVM. Here I I won’t repeat it again, but refer to the previous articles if necessary.

The above process of setting up a Linux system chick is a rather troublesome process. Next, we will share an easier process. First it is difficult and then it is easy. It is our working style to start with bitterness and then sweetness. ah! Let’s take a look at the most convenient way to set up a VPS for Windows systems. To be honest, it is also possible to directly install the official XenServer method to open a VPS, but if it is simple and easy to operate, I personally prefer to use Yungu's script to automatically download and import new templates, and then quickly create a VM.
Those who are often optimistic about VPS gatherings or those who buy VPS sold by Chinese IDC may often see Xernsystem or IDCsystem, which is a VPS management system based on XenServer system developed by Yungu. In this article, we only use Its scripts for importing and downloading templates.
Official XenServer one-click deployment script introduction page: http://www.chinahost.org/page-6107-1-1.html
The following parts are copied from official content, so please pay attention.
Log in to the server where we have installed the XenServer system using SSH and execute the following code:
| 1 2 3 4 |
cd /tmp rm -rf Auto.sh wget http://os.xensystem.net/XenSystem/download/Auto.sh sh Auto.sh |
After running the script, we select the task to be performed. Here we choose 1. We only need to import his system template.
I'm sorry that I don't have screenshots of these steps to execute the script on the server, but it is quite simple.
After selecting the task, you will see many system templates, including Windows and Linux. Just write the number of the system template you need at the end. Multiple systems are separated by commas.
Press Enter after finishing, and it will automatically import the operating system template to the server. Depending on the network conditions between your server and the system template server, this step is more time-consuming. You can leave and the latter will do something else and then come back.

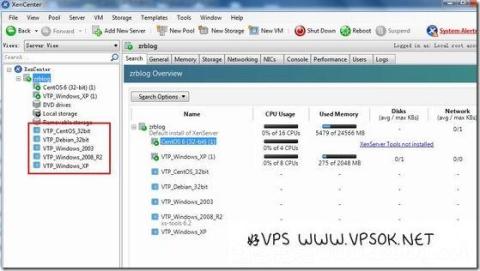
Looking at the screenshot above, you can see multiple system templates added in XenCenter after importing.
If we want to open a VPS now and use Windows 2003, then we directly right-click on the system template on the left and select Quick Create. Then, similar to the steps I shared above to open a Linux chick, step by step Complete the creation of VPS.
I tested it by opening winXP and 2003, and they were both OK.
Regarding the content of XenServer, I will write it here. If you have any questions, you can submit it and let us play. I won’t be able to play it when I reinstall the server system.
Many of my friends have followed the same trend as good VPS, starting from playing free hosting, paid hosting, VPS, and then starting to play servers. However, they cannot afford expensive machines, and the cheap ones are old machines without IPMI. Reinstalling the system still has trouble. Charging is so troublesome, what should I do? In this case, I think the advantage of playing as a virtual chicken comes out. You can reinstall the system at any time, and you can also install Windows yourself, which is very convenient.