Previously, I wrote a WHM installation tutorial ( recalls the past ...). In fact, this is relatively simple, just a few lines of commands, and then waiting. After this process is completed, we can basically add Package plan, create an account and build a website. However, what should we do if we need to adjust the Apache, PHP, and MySQL versions and add support for some components? In addition to compiling one by one after logging in through SSH, is there any other easier way? The answer is yes. Today, Good VPS will introduce the EasyApache tool of the WHM panel.
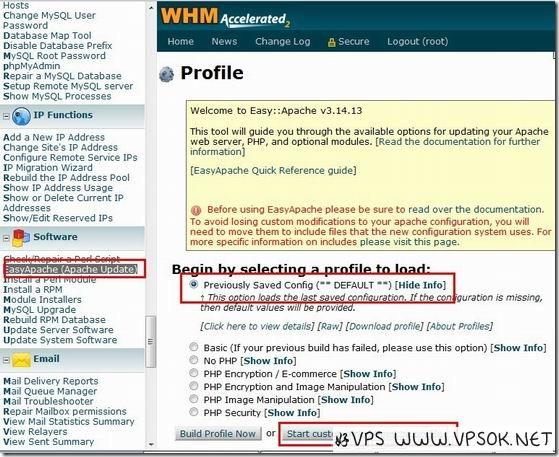
First, log in to WHM with the administrator account and select the EasyApache (Apache Update) submenu under Software on the left menu. As shown in the picture:

In the above step, you can choose according to your own needs, or you can keep the default inconvenience (the highlighted part in the picture), then click start customizing based on profile to select the Apache version page.

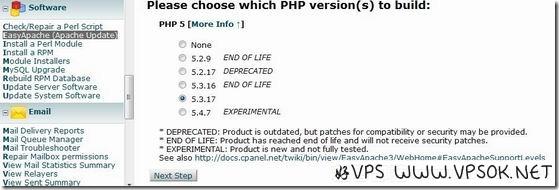
After completion, in the next step, select the PHP version.

Note that this Apache version and PHP version should be selected according to your own requirements. The VPS selected in this screenshot is just a personal habit and does not represent authority. After that, proceed to the next step.
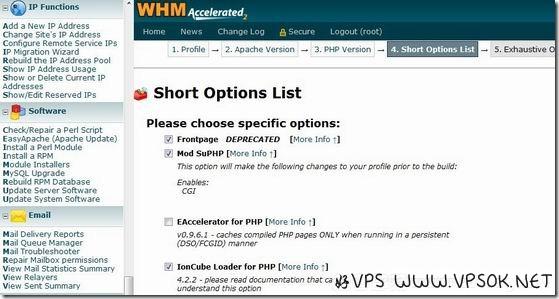
This step is crucial. There are many options to choose from. We can click on the Exhaustive Optinos List at the bottom to expand all projects and select the required components according to our own requirements, including Zend Guard Loader, IonCube Loader, EAccelerator, Xcache, and GD. , Hash, etc. Many components can be compiled directly after selecting them here. Since there are too many settings to be set here, a complete screenshot cannot be taken. You can click More Info behind each component to view information about this component.

After completion, select Save and Build to start compiling the version and components you need. This process may take a long time, so do not close the browser.
Finally, review the probe to see if all changes took effect.

