Previously, we installed SolusVM together and successfully opened a VPS with OpenVZ architecture. Today, Good VPS will talk to you about how to integrate SolusVM into the WHMCS system and realize automatic VPS activation. Today's tutorial still uses the OVH server I purchased before as a test. The WHMCS host is provided by the VPSAA host .
Let’s first take a look at what integration requires in SolusVM.
In order to ensure that WHMCS can connect to SolusVM, an API is required. Log in to SolusVM, click CONFIGURATION on the header menu, and select the API Access menu in the drop-down menu.
Click Add API User, as shown below:

Please record the above information, including API ID and Key, it will be needed later.
OK, the operation of SolusVM is that simple. Next, start the WHMCS side settings.
The administrator logs into the WHMCS backend. First, add the server. I don't need to take screenshots of these steps. If you don't understand, please read my previous article. There are similar actions for integrating WHM, DA and KLOXO.
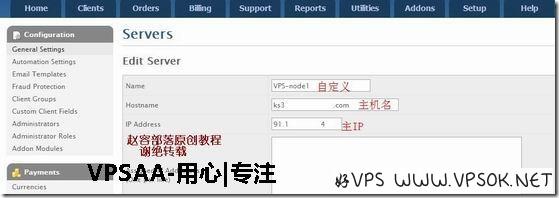
I will divide the adding server part into two parts. First, add the name, host name, and server IP in the upper part.

Then the following part is as shown in the figure. The module selects SolusVM. The username and password are the API ID and Key I just asked everyone to record.

Save when finished. Likewise, add a server group and point it to this server.
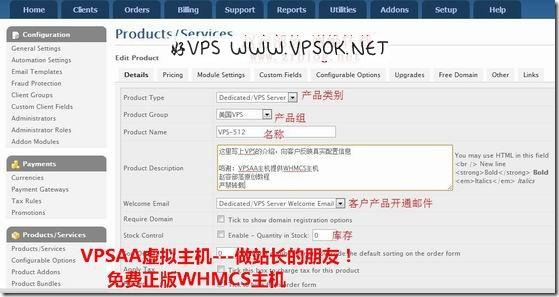
Next add products, as I have marked them in the picture below.

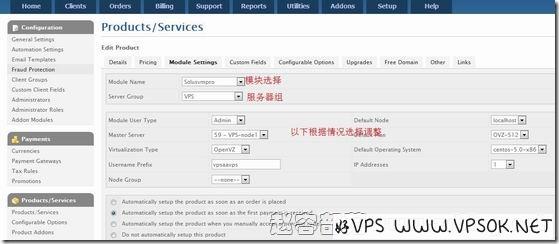
The above is the details. I will ignore the pricing part and select the third interface setting part.

After completing the above settings, please test the subscription activation by yourself.
This ends the tutorial on SolusVM. As for how to use SolusVM to build XEN and KVM architecture products, please follow the official Vico research.

