
Good VPS released the general process of WHMCS integration with CP in November last year (WHMCS associates WHM/cPanel to automatically activate the host simple tutorial), which has attracted the attention of many friends. CP is a very powerful panel, but based on the higher price and the convenience of the reseller in assisting users with complete backups, many friends prefer another powerful panel: DirectAdmin (DA for short). Today, is good The VPS tribe will share the general idea of WHMCS+DA to automatically activate the host.
***Please note: The DA described in this article is not the end user end, but the reseller end with distribution function. This article is mainly based on pictures, supplemented by text descriptions. ***
Before WHMCS integration, we need to make simple settings in the DA panel, mainly adding package types. (Also called resource package plan in CP or KLOXO)
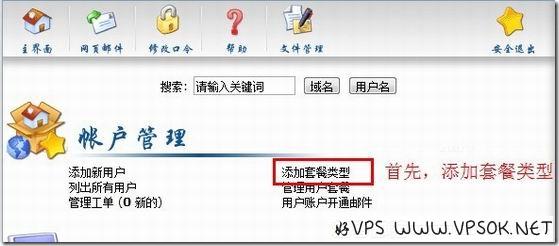
Log in to DA, click Add Package Type, as shown below, and set the configuration of this package.
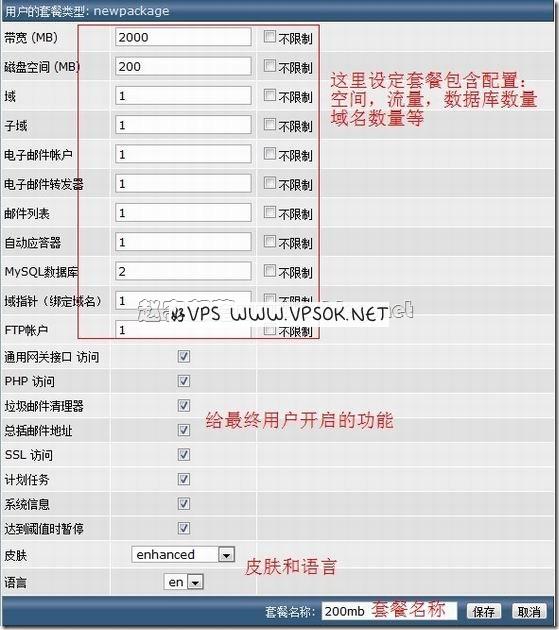
Save after completion and remember the package name. This is very important and will be used in WHMCS later.
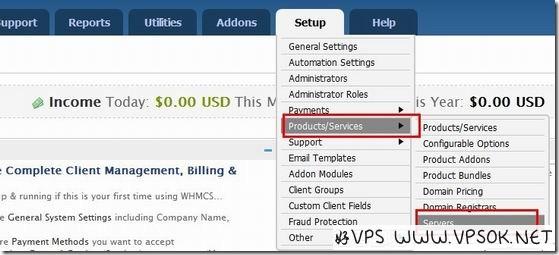
Next, we start the WHMCS setting part (the screenshot of this article is the WHMCS English background, the description is in Chinese, please note). Log in to the WHMCS backend, click Settings, Products/Services, Server.
Then, we add the server. After clicking, you will see the following picture. Set the server name, host name, server IP, panel type, login account and password. (There are many settings on this page, I only cut out some important settings, please refer to the rest for details)
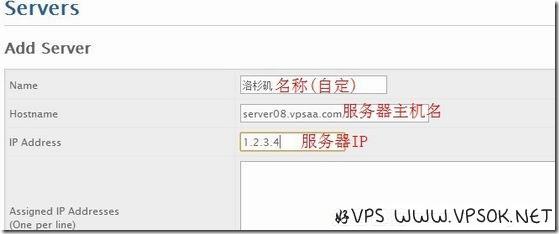

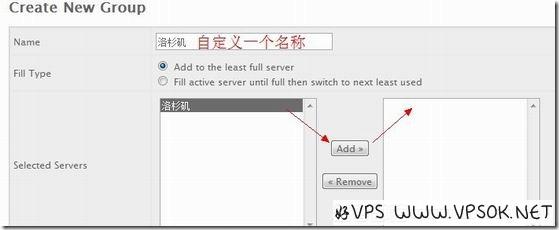
After OK, save. If the settings are correct, you can click Server The subsequent quick login logs directly into your panel. Then add a group, as shown below:

The following is a screenshot of adding a group:
After solving this, we set the product, and the menu is as shown below:
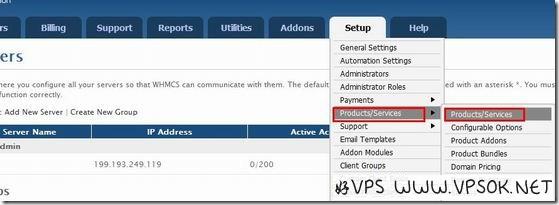
First create a product group, which can also be said to be a classification, as shown in the picture:

Next, add products and click to go to the picture below:

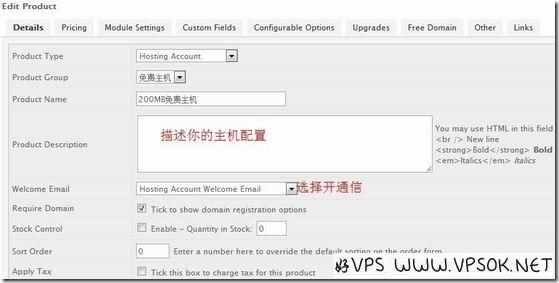
After choosing to continue , come to the picture below, the first menu at the top is product information, make basic settings as noted in the picture.
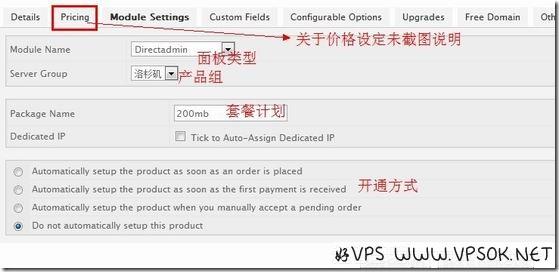
I did not take a screenshot of the payment settings. Now let’s look at the third header menu, which is about the interface settings. As shown in the picture: Select your panel type, product group, fill in the name of your previous package type in Packed Name, and finally select the activation method and save.
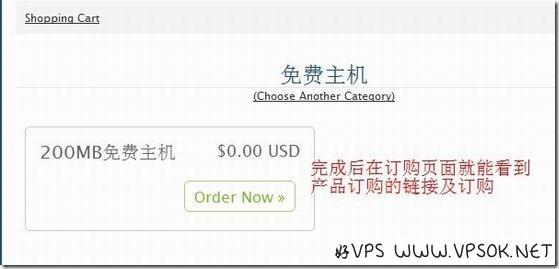
After the above settings, your host can be activated automatically. You can go to the user center and order product page to see this product.
Okay, the general process of WHMCS integrating DA to automatically activate the virtual host is as above. This article is also used as the official help material for VPSAA distributor host. Reprinting of this article without permission is strictly prohibited. content.
[Postscript]I personally think that the screenshots in this article have completely recorded the process of integrating WHMCS with DA. If you plan to integrate WHMCS+DA is used for commercial purposes. After referring to this article, you still cannot activate the host. I suggest you give up entering the IDC field and leave a guarantee for end users. Thank you for following the Good VPS tribe, and thank you for following VPSAA!

