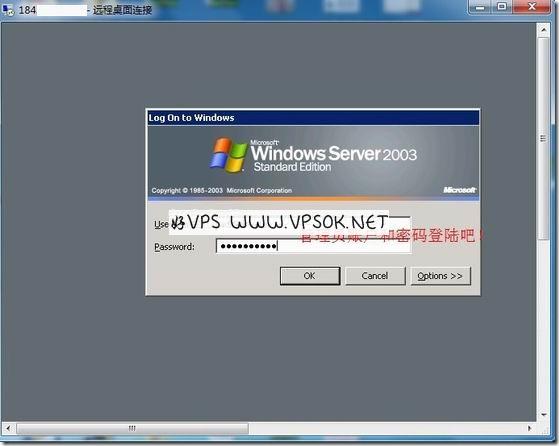
As we all know, the latest BurstNET discount continues, so many friends seized the opportunity to buy BurstNET's windows VPS, which only cost a little more than 6 dollars after using the 20% discount code , quite value for money.
However, some friends, like good VPS, have been paying attention to Linux for a long time, and are really not used to windows VPS. Some friends asked: Why can't my VPS be directly connected remotely? Okay, today I will start with the Windows VPS management panel VNC connection of BurstNET and teach you step by step how to open 3389 connection .
First of all, the operating system used in this article is Windows 2003 Ent R2 32Bit, and other systems are basically similar. We come to the VPS management panel. BurstNET uses the well-known SolusVM panel. First, we can see the VNC and VNC password menus, as shown in the picture:
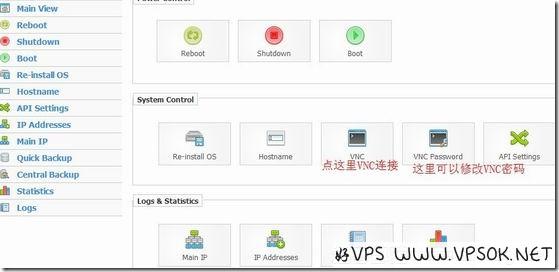
As shown above, the VNC Password can change the current VNC connection password, and the VNC menu is the background VNC connection page. We will use the VNC connection provided by the background (you can also use tools, I will note at the end that the background VNC requires JAVA control is supported. If you cannot use the background VNC, please download the control yourself or use a tool to connect)
Well, after the connection is a subsequent installation process of Windows, as shown in the figure, the Windows installation is starting.
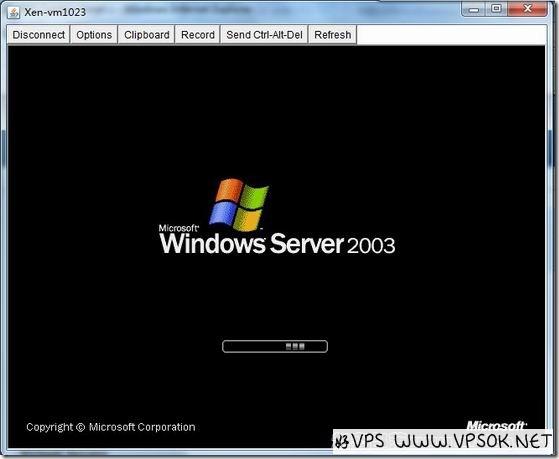
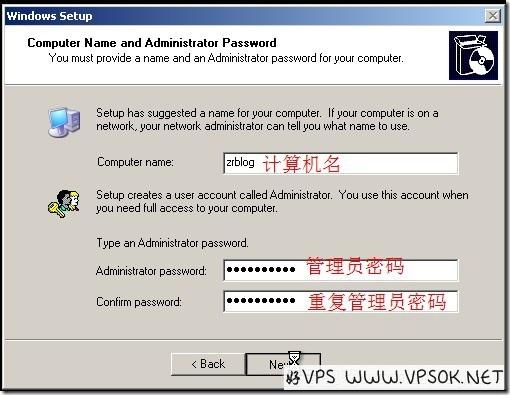
At this time, although the windows interface comes out, the installation has not been completed yet. This step is similar to how we usually install the Windows system. We basically keep pressing the next step. When we need to make a choice, select Agree or OK. Finally, when we get here, we set the computer name and administrator password according to our situation. Settings, as shown in the picture:
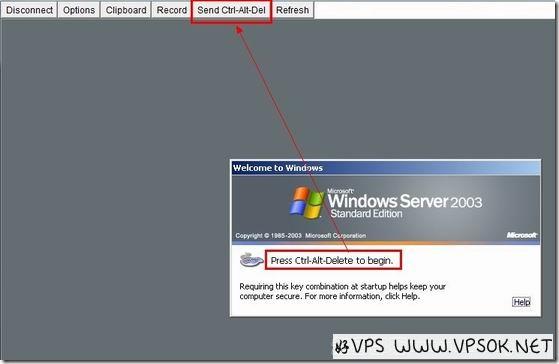
Finally, after the installation process is completed, it will automatically run to the login interface, as shown in the picture. You need to press CTRL+ALT+DELETE on the keyboard. The VNC connection tool menu is generally available. , I used arrows as a guide here.
Finally, we finally came to the familiar windows desktop.
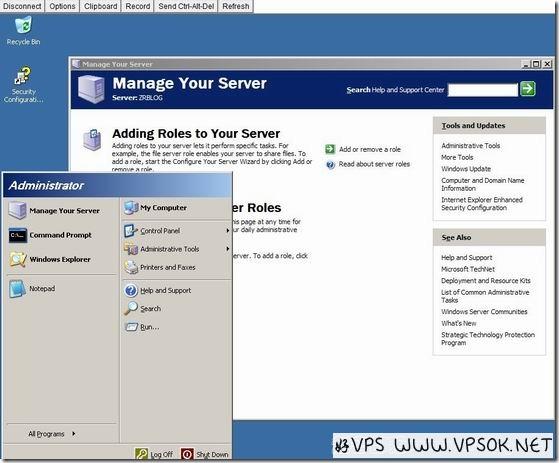
At this time, we still cannot use the remote condensation tool that comes with the system to connect to our VPS. We need to do the following two parts: ① Turn off the system firewall ② Allow remote desktop connections .
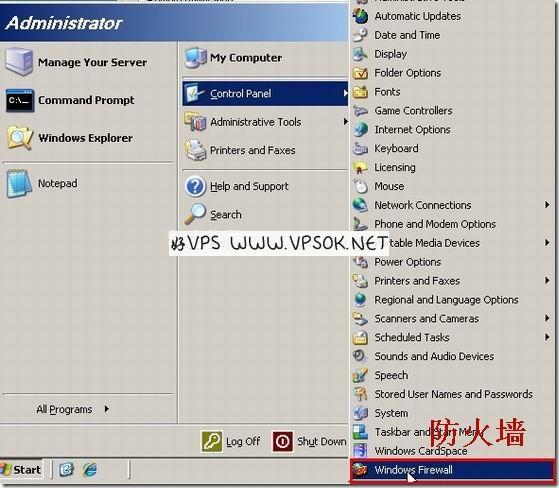
Below is a screenshot of the process of turning off the firewall. Click Start, Control Panel, Windows Firewall (this is the English interface, I describe it in Chinese, the pictures are marked, you can compare it carefully)
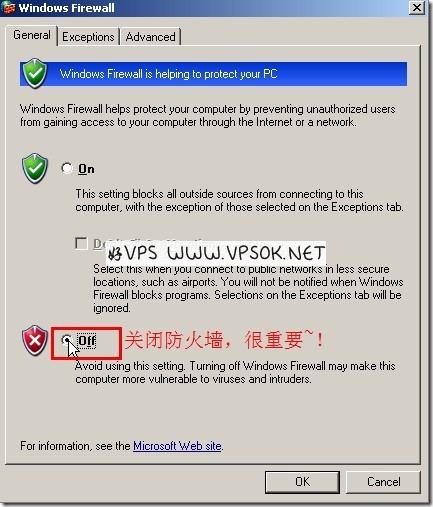
After opening the windows firewall menu, you can see that the default is On, we select Off, and then OK.
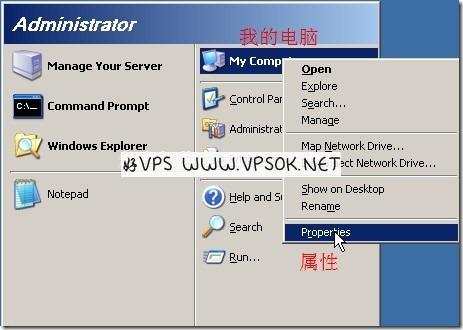
Next, we start the second task, opening the remote desktop connection. First, click My Computer in the Start menu, right-click on the mouse, and select Properties.
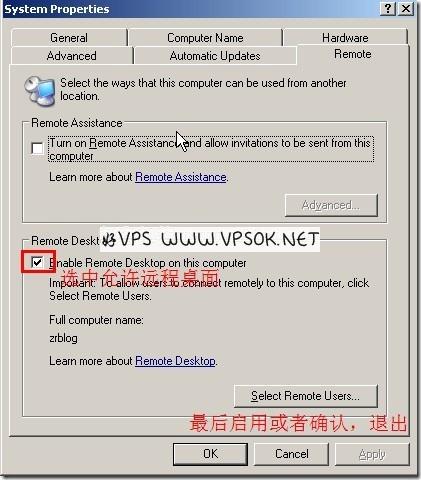
See the picture below, select the part I selected, allow remote desktop connection, and the whole process is complete!
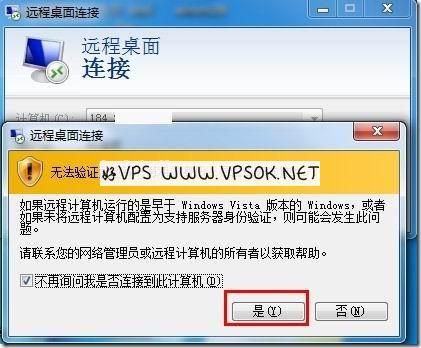
Now, we are ready to connect to our VPS locally and remotely! Start - → Run - → mstsc, open the following program, select "Yes" in the pop-up dialog box that cannot be verified to continue. In order to avoid asking the same question every time, you can also select "Don't ask me again if I can connect to Select box in front of this computer."
In the last picture, port 3389 is open. We use the system remote connection tool 3389 to connect to the VPS. Use the administrator account and password to log in!
