This article is mainly a record, referring to the operation process of many technical articles on the Internet. I seem to have encountered some problems in using it myself, but in order to avoid forgetting it in the future, I decided to review this process. The article was operated in an environment where the Junge LNMP one-click package was installed on two American VPSs. MySQL Database master-slave synchronization has many advantages. For a superficial person like me, the most useful one is as a backup.
Because the two hosts I used in this example have already installed the LNMP one-click package, MySQL is already installed, and PhpMyadmin can manage the database, so the installation process is skipped. Some subsequent operations are also directly performed in PhpMyadmin. Riga.
First create a database on the main server and add users. I operate it directly in PhpMyadmin for visualization!
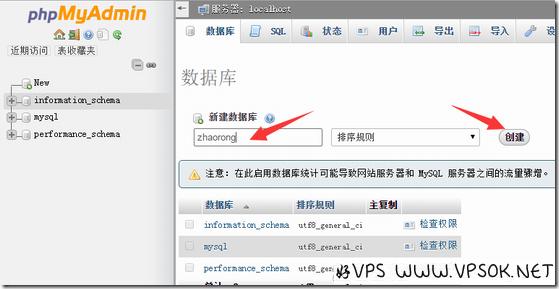
As shown above, I added a database named zhaorong. Then add the user, I also set the user name to zhaorong, and give him all permissions to the database zhaorong.
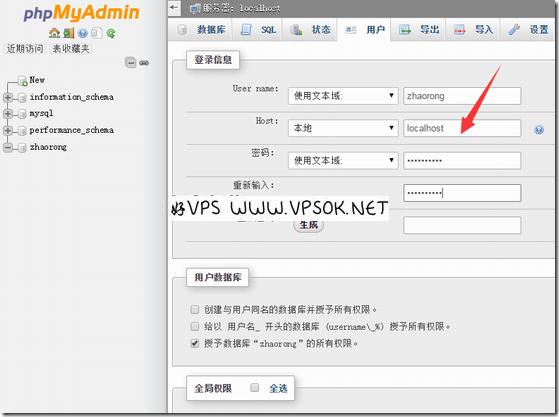
Note that the database name and user name set above can be set arbitrarily. It is convenient to remember that I set them to the same directly.
Next, we create a slave synchronization user for the database zhaorong on the main server and set the password.
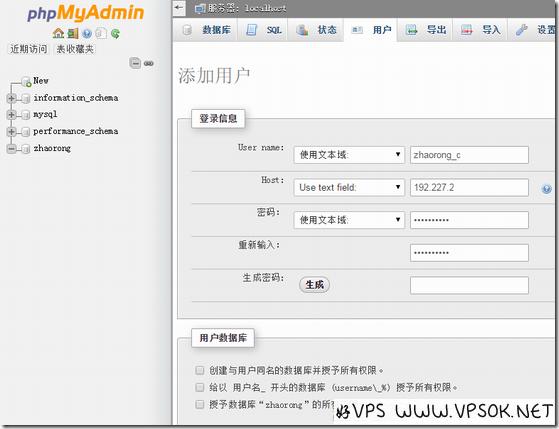
The above figure creates a user zhaorong_c and specifies that it can only be accessed from the slave server IP. Note that the following permissions only have backup permissions.

Next, we export the database in the master server to the slave server, and log in to the master server via ssh to execute.
mysqldump -uroot -p**** –default-character-set=utf8 –opt -Q -R –skip-lock-tables zhaorong > /home/zr.sql
The above *** is MySQL Database root password (skip the first two -).
Pass the backup database to the slave server, where I also put it in the home directory.
scp /home/zr.sql [email protected]*:/home
Then we go to the slave server settings.
First configure the my.cnf file of the main server. The my.cnf of lnmp is in /etc/my.cnf
vi /etc/my.cnf <x2 > #Edit
server-id=1 #This line itself has
log-bin=mysql-bin #This line It has
binlog-do-db=zhaorong #Join the database that needs to be synchronized
binlog-ignore-db=mysql #Not synchronized MySQL system database
Save and exit.
service mysql restart #Restart the database
mysql -uroot -p**** #Enter the MySQL database console
mysql> show variables like 'server_id'; #Check whether the server-id value is 1
mysql> show master status; # Check the main server information
I still use screenshots to express the above two lines:
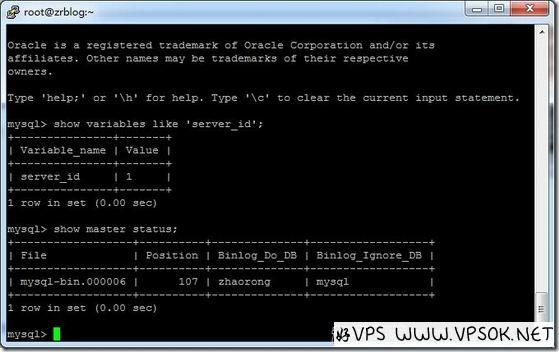
Record mysql-bin.000006 and 107 in the above picture for later use.
Then we configure the my.cnf file of the slave server.
vi /etc/my.cnf #Same, edit the file
server-id=2 #The default is 1 to 2
log-bin=mysql-bin #This line itself contains
replicate-do-db=zhaorong #The database that needs to be synchronized
replicate-ignore-db=mysql #Asynchronous system database
read_only #Set read-only permission
Save and exit.
service mysql restart #Restart the database
mysql -uroot -p**** #Enter the MySQL database console
mysql> show variables like 'server_id'; #Check that server-id is 2
mysql>slave stop; #Stop slave Server synchronization process
mysql>change master to master_host='209.148.95.*',master_user='zhaorong_c',master_password='***',master_log_file='mysql-bin.000006′,master_log_pos=107;< x2> #This line is relatively long. Note that mysql-bin.000006 and 107 are the previously recorded
mysql>slave start; <x2 > #Start the synchronization process
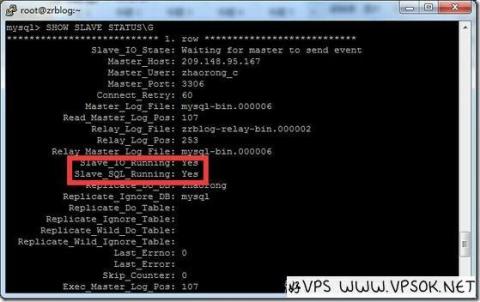
mysql>SHOW SLAVE STATUSG #View the slave server synchronization information
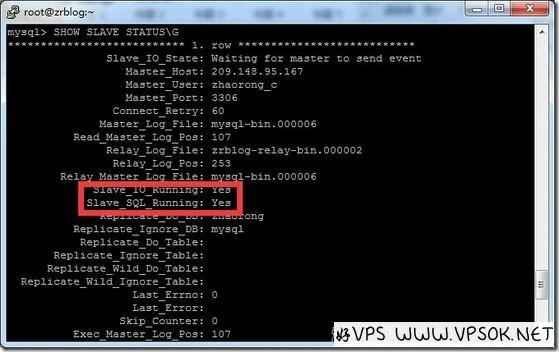
As shown above, see It's OK when both lines in my red box are Yes.
After that, we can test it by creating a table on the master server, and then log in to the slave server database to see whether the table has been created synchronously.
