2 years ago, I followed my fourth senior brother to learn how to install Windows on KVM which does not support Windows. However, on the one hand, I did not have the need to build a website under Windows, and on the other hand, I do not know how to use Windows. When it comes to building websites, I feel that Linux is more comfortable by simply copying and pasting commands. Therefore, apart from the excitement based on the sense of accomplishment after installation, there is only silence. However, because there are fewer and fewer things to write, I still hope to regain some basic things about Windows. Let’s first review how to install Windows on a KVM VPS that does not support Windows.
[Foreword] Strictly speaking, it is illegal to install Windows on a KVM that does not have a built-in Windows ISO by the hosting provider. The hosting provider can terminate the product at any time. Therefore, what is mentioned in this article is only for testing. If you are serious about building a website, please Buy windows VPS directly.
The process described in this article is mainly to install Debian first, and then use Ghost to install Windows. Moreover, I installed Windows XP in this article. The test machine in this article is a KVM that pays 4 US dollars per month and is configured with 512M memory and 25GB disk. Because The specific IDC will not be disclosed if the operation is suspected of being non-compliant. In addition, because the whole process is long, I mostly use text descriptions and screenshots of key parts, please pay attention.
First, we need to install Debian on KVM. For how to install Debian on KVM through VNC, please see my 2011 tutorial: https://www.vpsok.net/VPS_help/article_1565. html
The process is the same, the only difference is the partition, as shown in the screenshot below:

I want to explain the partition, which lays the groundwork for the subsequent operations. . In the boot partition, we need to put grub4dos. Originally, /boot is generally 100M, so it is appropriately larger here; /dos needs to put the GHO file. A WinXP ghost file is at least 600M or more, so increase or decrease it appropriately; /windows No need to ask...
Since Debian has been installed, we can directly SSH into the VPS for the next step. The files that need to be prepared here include: maxdos.img, grub4dos.tar, WinXP.GHO, etc. (if You install win2003 and prepare the corresponding gho file)
| 1 2 3 4 5 6 7 8 9 10 |
[email protected]:~#wget http://*******/maxdos.img [email protected]:~ #wget http://*******/grub4dos.tar [email protected]:~#wget http://*******/WinXP .GHO [email protected]:~# mkdir /boot/boot [email protected]:~# cp -r maxdos. img /boot/boot/MAXDOS.IMG [email protected]:~# cp -r grub4dos.tar /boot [email protected]:~#cp -r WinXP.GHO /dos [email protected]:~#cd /boot [email protected]:~#tar -xvf grub4dos.tar [email protected]:~#reboot |
Restart, change VNC, pay attention to press the c key during startup to enter the grub boot page as shown below:

Input item: grub>linux (hd0,1)/grub.exe, press Enter, enter boot and press Enter .
When you see the following page, select MAXDOS.IMG.

Enter the MAXDOS tool menu.

Enter ghost directly and press Enter. Note that the input here is very stuck. When I first did this, I even suspected that there was something wrong with my keyboard and it was not flexible. Every time I pressed a letter, I waited for it to appear. Press another one.

Enter the Ghost interface in the picture below. I started using win95 in 1998. Especially in the XP era, ghost installation systems are very popular and various ghost versions emerge in endlessly. If you have enough history in operating computers Sorry, the screenshots that follow are completely meaningless to you, because they are the same as when we used ghost to install the XP system. Click the image below to select Local, Disk, From Image.

Because the mouse cannot be used, make good use of the TAB key, move to the partition selection, press Enter, select C, and then select the WinXP.GHO file.

Set the partition size to be enough to install a system, or you can use the entire disk.

The work has already started, please wait slowly. This process will take some time. If it is an SSD hard disk, it will be faster.

After the entire file is copied, there will be a pop-up box, press Enter to restart the system, and then complete the installation just like our local ghost installation system.
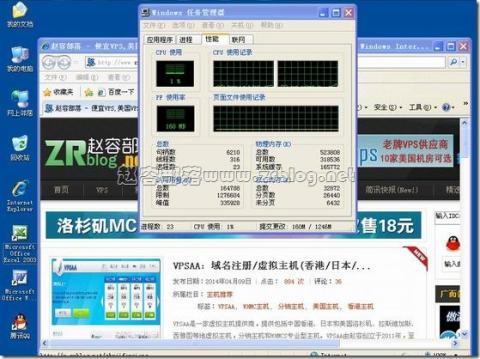
After the installation is complete, the first thing to do after entering the system is to set TCP/IP so that the machine can access the Internet; then open the remote desktop so that we can directly connect to the VPS remotely through 3389. The last screenshot of the desktop after remote connection:

If you want to talk about possible problems, you may not be able to find the network card driver after installing the system. This is very simple, just change it directly in the VPS management panel. Just the network card.
In addition, we initially installed it using the ISO method 2 years ago, which is similar to this process, but with a small extra step. I will just make an analogy for your reference.
| 1 2 3 |
[email protected]:~# mkdir xp [email protected]:~# mount -t iso9660 -o loop,user win_xp.iso xp [email protected]:~# cp -rf xp/* /windows |
Finally, in order to avoid the ISO ownership issue in the previous KVM installation windows tutorial, in this article I used a WinXP system GHO and packaged it myself. The original version came from Microsoft. I would like to pay tribute to Microsoft! At the same time, I would like to remind you again that if you perform similar operations on a KVM VPS whose host provider has clearly stated that it does not support Windows, you do so at your own risk. If it is blocked by the host provider, you will be responsible for your own fault and you will bear the consequences. Remember!
Download some resources:
maxdos.img http://pan.baidu.com/s/1sj6lOZj Extraction code 8lfs
grub4dos.tar http://pan.baidu.com/s/1bns1nrT Extraction code gfj5