In the previous two articles, we talked about some tutorials on how to use KLOXO. I believe everyone can basically set up their own website after reading it. However, we all know that it is very painful to upload the website source code to the space using FTP. Things are quite time-consuming. Both CP and DA panels have online decompression functions. Does KLOXO also have it? Of course, today we will talk about the topic of online decompression.
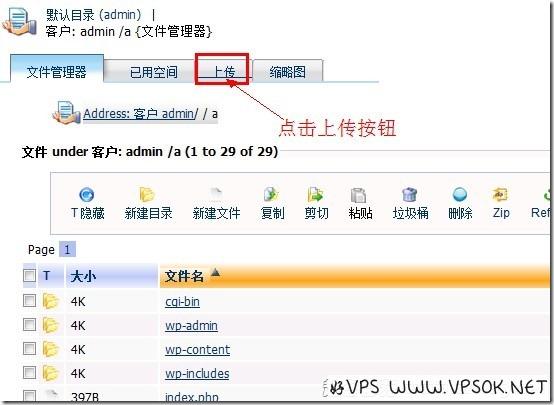
[KLOXO Online Compression and Decompression] First of all, of course, log in to our KLOXO panel, open the file manager, and enter the root directory of our website (which is the file named after your domain name) folder) and click the upload button at the top of the page.

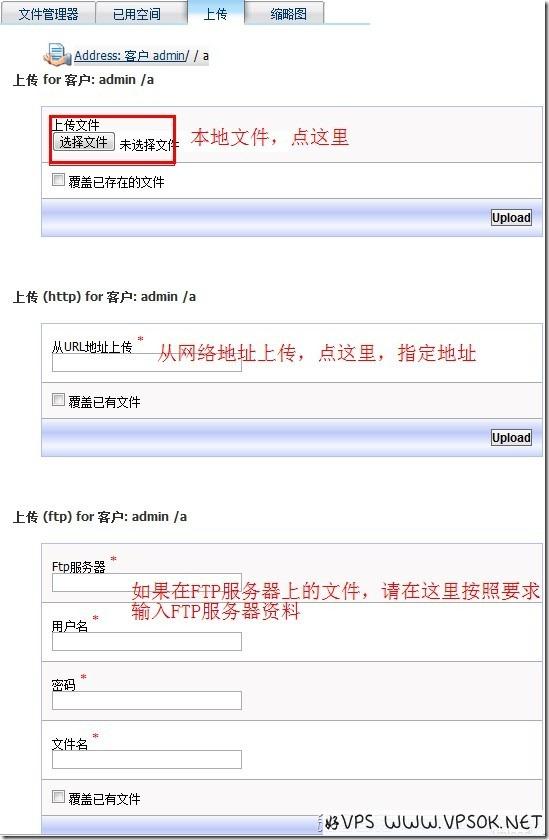
On the page below, we can see that KLOXO backend provides 3 upload methods. The first one is our most common, local upload, select the local file and click upload. (About the second and third upload methods, I marked them in the picture, and everyone uses them as required)

[Notes]About local Upload, what we are going to talk about today is online decompression, please upload the compressed package, KLOXO supports zip and tar.gz compressed files, please do not upload RAR files! ! !
After the upload is completed, the system will automatically return to the file manager page. At this time, we can see the successfully uploaded files.

Please see my annotation in the picture. There is a small icon in front of the compressed file we uploaded, similar to a compression tool. Click the icon to start the online Unzip, I don’t need the picture above, just unzip to the default directory~
In addition, the file manager also provides an online compression function, which is also more useful. You can select all files. Save it as a compressed package and download it locally. This is also a way to back up the website (note in particular that the backup I mentioned here does not back up the database)
[KLOXO database Establish】 Let’s talk about the database. The common PHP programs we use require MySQL database support, such as the common WordPress, DZ, etc. Therefore, before installing the program, we need to create at least one database.
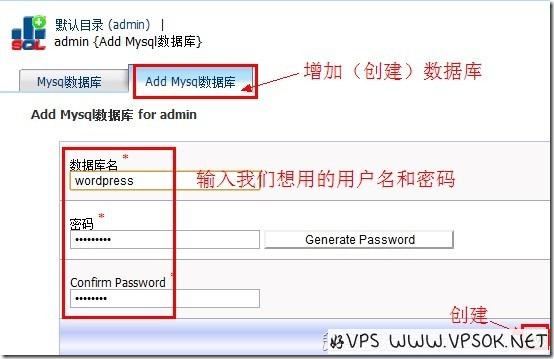
Open the default directory, find the "Domain Name" section, select the second item "MySQL Database", and then select Add MySQL Database.

In this way, a database is created.
[Tips] For the database created by , the user name and database name are the same, and the server address is generally the default localhost.

