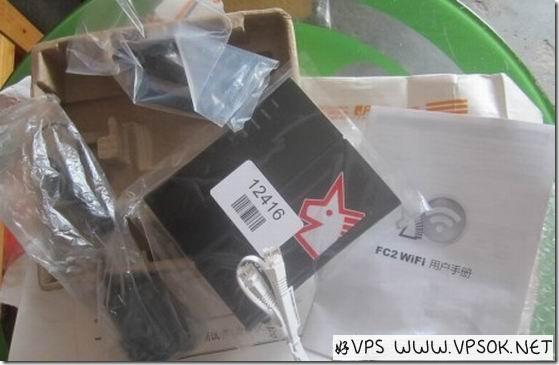
I received this little Japanese router last month, and I just threw it away there with so much trouble. I recently got some free time, and then I remembered that this item is still there. The country is currently fighting against Japan. We can't let the little devils collect our information through these things, right? To avoid future troubles, brush it! FC2 Wifi router does not support flashing under windows, so it is recommended that you use a virtual machine to install CentOS or ubuntu for flashing. Since the good VPS was still installed in April this year in order to write VMware virtual machines and install CentOS, I just flashed it directly under CentOS. If you don’t know how to install CentOS on a virtual machine, please: Review here
Prepare and connect
1. First connect the LAN port of FC2 wireless router to the computer (it can also be connected to the current router, which is me), plug in the power supply of FC2 router and turn on the power.
2. Start the virtual machine CentOS system, log in as root user, and install tftp
yum install tftp
3. Download the firmware and put it in the root directory
cd /root
wget https://www.vpsok.net/download/jp.bin
Flash back to the original system
Next, we need to flash the FC2 wireless router back to the original Japanese system.
First, stop the network and set the local IP address and specify the router IP.
/etc/init.d/network stop
sudo ifconfig eth0 192.168.11.2
sudo ifconfig eth0 netmask 255.255.255.0
sudo arp -s 192.168.11.1 xxxxxxxxxxxx (the MAC address of the router, as received It’s on the list)
Then, start flashing the machine (follow the steps)
#tftp
to*** Enter directly
tftp> verbose
Verbose mode on.
tftp> binary
mode set to octet.
tftp> trace
Packet tracing on.
tftp> rexmt 1
tftp> timeout 60
tftp> connect 192.168.11.1
At this time, there is a connection prompt, something like port 69.
Unplug the power supply of the FC2 router, wait for 2~3 minutes, plug it in again, then immediately enter the following command and press Enter (you can also unplug the power supply and enter it first, then insert it and press Enter directly) Can)
tftp> put jp.bin
Next, you can see that tftp is running and uploading will be OK within 1 minute. The last line is roughly the time taken to upload, as well as file size information, etc.
After completion, the router will automatically restart. After that, we can log in to the router using 192.168.11.1, with the username root and password empty.
Flash openwrt or DD-WRT
But it’s in Japanese characters, and I guess everyone is not used to it. At this time, we can directly upgrade OpenWrt through this web interface.
Flashing the computer through the web interface is very simple. It is the same as upgrading our usual routers, as long as there is a language barrier. However, fortunately, there are a lot of Chinese characters in the text of Little Japan, so click on the "Manage Settings" in the head, and then On the left side of the interface, there is "%¥&**Upgrade" in the middle. Click it. There is a button to select firmware. Click it to select the storage location of the local firmware. Finally, click to upgrade and it is OK.
A progress bar will show that it will be 100% completed and it will restart after completion. At this time, you need to log in with 192.168.1.1. The user name is root and the password is admin, all in Chinese.
If you still need to flash DD-WRT, just use the same method and directly upgrade via the web.
openwrt firmware: https://www.vpsok.net/download/openwrt-ar71xx-generic-whr-g301n-squashfs-factory-5-27.bin
DD-WRT firmware: https://www .vpsok.net/download/dd.bin
It should be noted that after the web is upgraded, it may not restart (it did not restart when I refreshed it). We can also directly close the web window and use the new router address. Login attempt.
Refer to the Global Host Forum CC tutorial for the above, and it was successfully tested by myself. The last router family photo:


