
A year ago, when a colleague wrote an article after using high-tech means to scan the port and concluded that HG's WHMCS host could not activate KLOXO, Virtualmin and other free host panels, I expressed this in the VPSAA Customer Center French Announcement To refute (see the VPSAA User Center Announcement on December 3, 2011), I recently reviewed previous blog posts and found that I have integrated WHMCS with tutorials on virtual host panels such as CP, DA, KLOXO, Kangle, etc. All have been released, but there is no part about the automatic activation of WHMCS integration with Virtualmin/Webmin, so I specially add it.
The following tutorials are all tested on the WHMCS host provided by the VPSAA host. The VPS used to install Virtualmin/Webmin is the OpenVZ architecture of the VPSAA host which is under internal testing. product.
We also divide the integration part into two sections to describe it. First, it is the settings on the server side.
Log in to our Virtualmin/Webmin panel (https://IP:10000, root account password). Since we are only describing how to integrate it into WHMCS, we will not talk about other things. WHMCS only requires two parts. One is the server template and the other is the account plan (similar to the resource package plan). The language is very pale, but a picture will make everything clear.
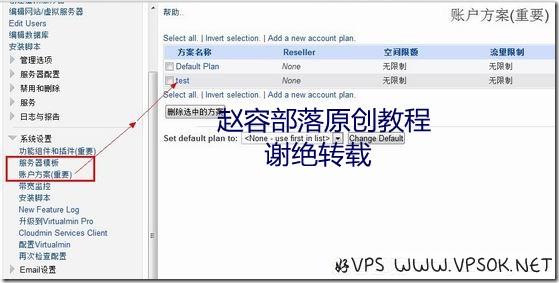
There are many setting items in Virtualmin/Webmin. This panel is also very powerful. It defaults to apache and can install nginx. Because this article is intended for integration, I will not mention its power for now. You can refer to the details yourself or make good use of search engines to learn more.
WHMCS setup and integration
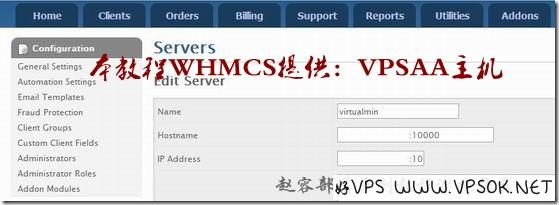
The administrator logs in to the WHMCS backend. First, add a server. I divided this screenshot into 2 parts. The above part is as follows. Pay special attention to the fact that port 10000 needs to be added to both the host name and IP.
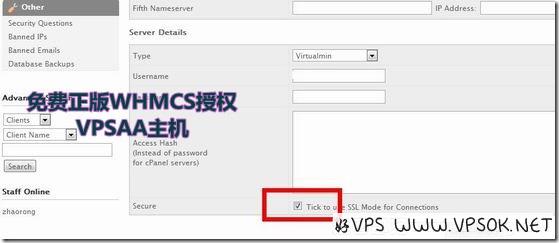
Next, select the type of panel, login account and password, and select SSL.
After that, add the server group. You don’t need to take a screenshot for this. Just give it a group name, and then add the server you just added.
Next, add product groups and products. We will mainly look at adding product items.
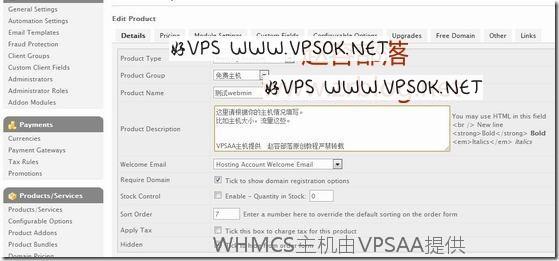
Next is the price and interface settings. I don’t need to provide any pictures for the prices. It’s your own business and depends on the interface settings.
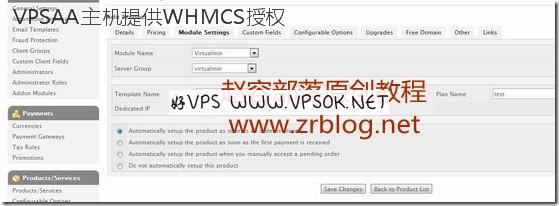
This is very important. As shown in the picture above, the templates and packages are what we set in Virtualmin/Webmin.
After everything is completed, please test the activation by yourself. Below is a screenshot of my test activation.
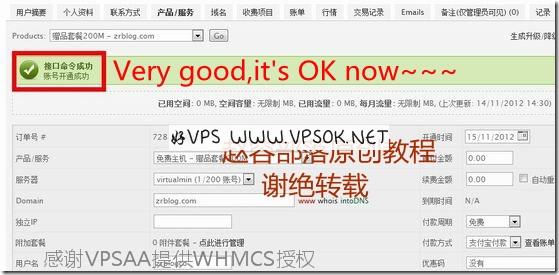
Above, the test of installing Virtualmin/Webmin on the WHMCS host +VPS provided by the VPSAA host passed. It is included in the VPSAA host WHMCS official tutorial series. If VPSAA customers encounter integration problems, please Submit a support ticket to contact technical department.
Original tutorial, no reproduction allowed.

