At the request of readers, I re-recorded the process of registering Vultr and uploading my own ISO yesterday ( previous review ). Today I will record the process of creating a VPS host and using my own ISO to install the Windows system.
In the previous article, we have registered and recharged the account (if not registered: please register first), and directly uploaded the ISO to the member center. Today we create the host and install the system. First, we log in to the member center: my.vultr.com

Click Servers on the left, then click + on the right to create a host. We divide it into several parts. Screenshot, the three items in the figure below can be defined as VPS host, large hard disk VPS host, and independent resource host.

The first item we purchase most is Vultr Cloud Compute (VC2). You can select a data center below. The page lists all data centers by default. You can also select by region through the header. Test IP of each data center: Test IP page

The following is to select the operating system. The picture below is the default operating system. You can also see the Windows option, but you can click You will know that they are all chargeable, and the prices are not low!

We choose our own ISO installation, select the header Upload ISO, as shown in the figure below, we can see the ISO uploaded before, and we can also upload the ISO directly on this page. I am in these locations are marked with arrows.

Next, choose a package. The lowest package for Vultr is US$2.5, but only a few computer rooms have it in stock. Most computer rooms start from US$5.

Then there are some additional options and host name settings, such as whether to enable IPv6, backup and DDoS protection, etc. Some of them are paid, and the prices are marked on the page.

After completion, we can directly click Deploy Now in the lower right corner of the page to create a VPS host.

As shown above, the host begins to enter the installation and configuration state, which will be completed soon. After completion, the status will be Running. We click Manage to manage the host.
There are several important parts in the picture below. I have marked them. For example, when we install the Windows system through our own ISO, we must use the VNC function, and then turn on and off, restart, reinstall the system and delete the host. .
Everyone can understand the two concepts of power on and off and restart. If you reinstall the system, you can change the system at any time by reinstalling it, such as switching to the Linux series. If you delete the host, you can delete the host at any time and stop billing, because Vultr is It is billed by the hour, which is very suitable if you just want to test an application or tool. You can delete it after you create it to complete the test, and only a small fee will be deducted.

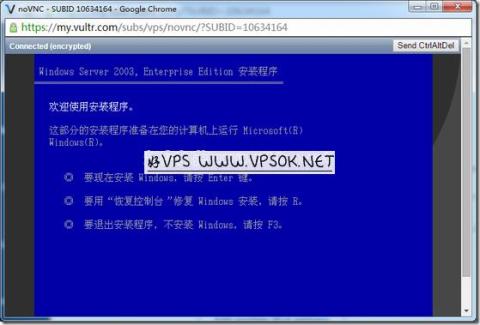
When we click VNC, we can see the system installation interface, and then just follow the steps to complete the installation.

The subsequent installation process is relatively simple, just follow the steps. If you really don’t know how to do it, send me your account and I can help you complete it when I have time.
Currently, Vultr also supports Alipay payment. It is also very convenient for everyone to buy directly without the need for purchasing agents.