Yesterday I shared the news that RamNode started to use the OpenStack platform, and at the same time the original VPS ordering system was removed. This ordering system from the member center to the OpenStack platform is still a little different from our traditional WHMCS system directly in the member center. There are small differences, so today I will post the overall ordering process for everyone. It is mainly for novice friends. Please skip it for veterans.
Merchant and product introduction: https://www.zrblog.net/21075.html
RamNode has opened a product for the OpenStack platform, click first Order linkOrder this product with a cost of 0.
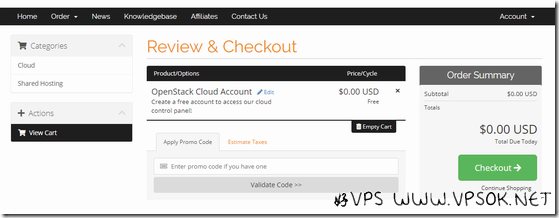
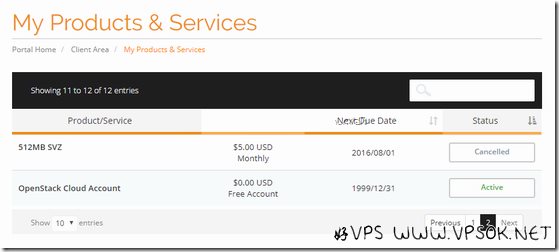
As shown above, after the order is submitted, you can see this product in my products and services, which is an OpenStack Cloud account.
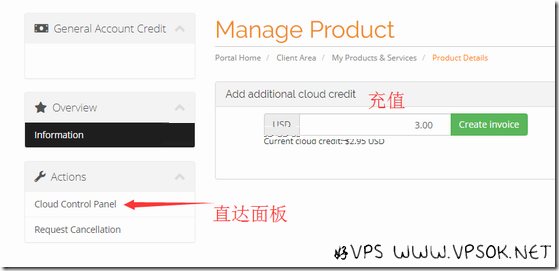
When we click on this product to open it, you can see the picture below. The left side includes one-click direct access to the Cloud Control Panel and the product cancellation button. On the right side, you can choose to recharge, the minimum It’s a $3 recharge.
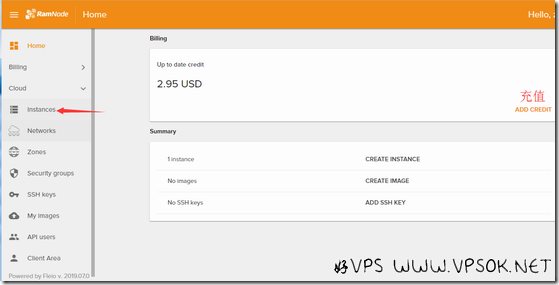
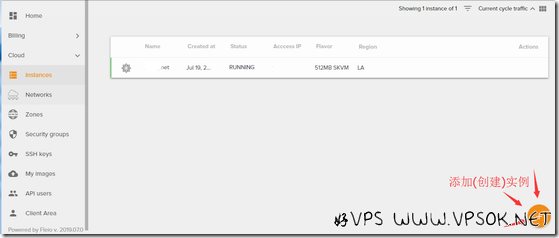
We can directly access the Cloud Control Panel to the OpenStack platform address by clicking one click in the picture above. We can also check the panel address in the product information email after the previous order is completed. and our login information. As shown in the picture below, there is also an ADD CREDIT recharge button on the right side of the panel. Clicking it will jump to the member center for recharge, which is the same as the screenshot above. The left side of the platform is divided into two parts: Billing and Cloud. Click Billing and we can see the bill history, including deductions; Cloud is divided into multiple submenus. The most commonly used one is the first instance, which is our VPS. There are networking, security groups, and ssh keys below. , api, etc., there is also a menu directly at the bottom of the member center.
If we want to open a VPS, just click the + sign on the lower right side of the instance page.
On the instance creation page, you need to fill in and select some general information, including host name, data center, package, operating system, set system login password, etc. Complete Then create it.
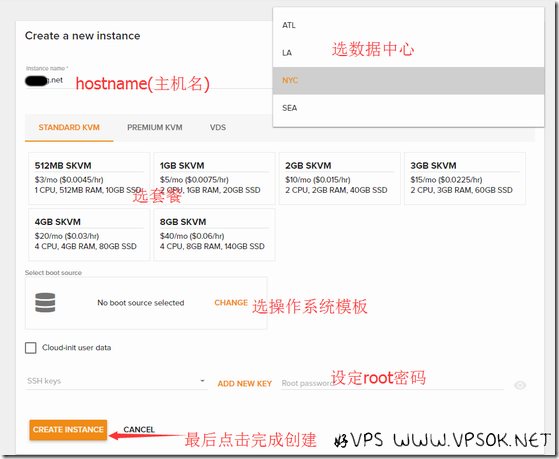
On the package selection page, we can see the monthly price and hourly price of each package. After clicking on the operating system template page, in addition to selecting the merchant's built-in system template , you can also choose to upload the ISO installation by yourself. When I bought it the day before yesterday, I estimated that there were not many people using the system. After creation, the machine will be in running status soon. At this time, we can log in and use the host in the same way as we usually use VPS. .
postid
17685
