CentOS Web PanelThis Linux host panel was recommended by an enthusiastic reader. I have only seen good VPS before but not installed it. It seems that not many people use it. It is Apche's Web environment. However, I personally feel that this panel It looks quite impressive. It is an additional option for those who don’t like command line operations. Today I will introduce the installation and simple use of this panel.
First, let's take a look at the installation process.
As the name suggests, this is the host panel under CentOS, so the server (VPS) system needs to be CentOS, preferably CentOS6.*. I have also tried it on CentOS5 32bit on a good VPS, and there is always a component prompt, of course. This may also be related to the template of the VPS hosting provider I used, because I tested it on a 512M memory VPS with an annual payment of 12 US dollars, and I felt that the background response was slightly slow.
The following installation tutorial comes from the official website: http://centos-webpanel.com/installation
| 1 2 3 4 5 6 7 8 9 10 11 |
Installer 32bit command wget http://centos-webpanel.com/webpanel/main.php?dl=installer_04_32bit mv main.php?dl=installer_04_32bit installer chmod +x installer ./ installer Installer 64bit command wget http://centos-webpanel.com/webpanel/main.php?dl=installer_04_64bit mv main.php?dl=installer_04_64bit installer chmod +x installer ./installer |
The installation process is relatively fast (forgive me for not timing it, I opened the screen and ran away). It should take about the same time as compiling Junge's LNMP, maybe faster.
After the installation is completed, access it with IP:2030. The default username and password are root and admin123, which can be modified after logging in.
Let’s take a screenshot of the installed CentOS Web Panel backend:

The overall interface looks quite high-end and the functions are quite comprehensive. You can also Run Java's SSH connection directly in the background.
Let’s focus on how to make a website on this panel.
To build a website, you must first bind a domain name, then transfer the source code and establish a database.
Bind a domain name: Click Accounts on the left side of the menu and select New Accounts.

As shown above, add domain name, username, password, select Package, email, and finally create it. (Please note that this panel can also pre-set the resource package, that is, Package, we have not set it here)
Next, create the database. There is MySQL Manager at the head, so we don’t have to go to the left to find it. Go wherever you want. After clicking, you can see a line of menus above. The easiest thing is to create Database and User in one step. Users and databases are done at once.

As shown above, it will automatically generate a password for each step. You can also set a password yourself.
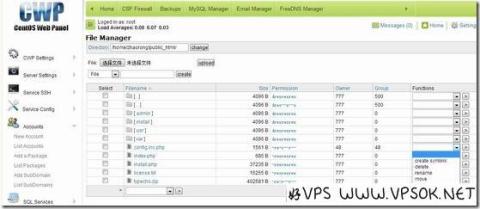
After completion, we upload the source code. This panel already comes with a simple file manager function, which is really simple. I tried and couldn't decompress the zip, and I don't know if I didn't find it...
Click File Manager on the left and select Simple File Manager.

As shown above, we can change the directory, upload files from local, create files or folders, and do simple processing on files or folders such as deleting, moving, copying, renaming, downloading, and editing. etc. But I couldn't find the decompression. I uploaded the zip and then logged in via ssh to unzip. Another thing I didn't find was the permission to modify settings...
In fact, this panel is quite interesting. The background display is very comprehensive, including machine information, hardware usage information, top information, and it also has built-in CSF firewall and backup functions.