Since the previous tutorial on VULTR uploading its own ISO to install the Windows system was already in 2014, the official website backend has been updated to a certain extent. At the request of readers and friends, take the current customer center as an example to re-record Vultr registration , Tutorials on recharging, placing orders and adding your own ISO to install the Windows operating system are for the convenience of novice users.
Vultr is a method of recharging first and creating later. After the user registers, he first recharges a certain amount into the account. Last month, Vultr also officially opened the Alipay recharge method to all customers. The minimum recharge using Alipay is 10 US dollars, and using PayPal The minimum recharge is US$5. The lowest package currently provided by Vultr is US$2.5 per month, but it is available on very few nodes, and the commonly available packages start from US$5 per month.
First, we log in to the member center. If there is no registered user: Please register as a member first

As shown above, after logging in, click Billing on the left, and then select the payment method , if you don’t have PayPal, click on Alipay, then select the amount on the right, and finally confirm Pay with Alipay. I tried using Alipay to recharge 10 knives, which was 66.06 yuan (the specific fee will vary according to the exchange rate update). After completing the recharge, we directly You can see your account balance in the upper right corner of the Billing page.
There are two ways to add ISO to Vultr: one is to upload the ISO first and then create the VPS, the other is to upload the ISO during the process of creating the VPS, both are OK. Here we will add the ISO first.
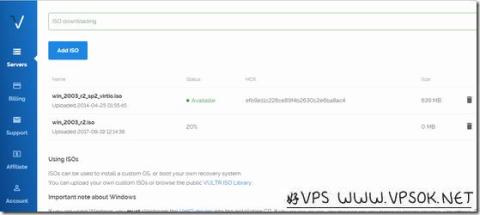
As shown below, click Servers on the left, select ISO in the header menu, and then Add ISO;

The following picture is the interface for adding ISO, we input under Upload ISO Enter the URL address of the ISO file in the box, then Upload, and the system will start uploading.

We will see a percentage of progress. As you can see in the picture below, there are 2 ISO files. The upper one was uploaded by me in 2014, and the lower one was uploaded immediately. Wait until it is 100% completed. Finally, the ISO file below is the same as above, showing the file name, upload time, MD5 and file size.

After the upload is completed, when we create a VPS later, we will be able to see and select the system ISO file we have uploaded.